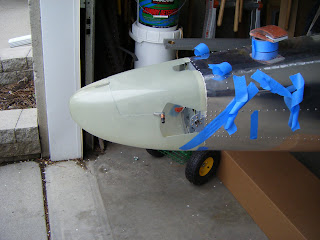
This evening I did some work on the tailcone fairing. I made the permanent connection between the upper and lower halves. I started by taping the lower fairing section to the tailcone. I then clamped the upper section to the lower section and the tailcone. After making sure the fairings fit the tailcone correctly I removed the upper fairing and clamped, drilled then clecoed the tabs to the lower fairing as shown on the drawings.
Next I put the upper fairing in place and taped it to the Tailcone. I then drilled and clecoed the upper fairing to the tabs previously clecoed to the lower fairing. I removed the clecoes and the tabs and cleaned up the chips. I clecoed the tabs inside of the lower fairing and drilled and clecoed upper fairing to the tabs.
I removed all of the clecoes and drilled the holes in the upper fairing with a modified #27 drill bit. I took the tabs into the shop and drilled out the center hole in the upper half of the tabs with a #27 bit. Using a #40 microstop countersink I prepared the tabs for the installation of the required nutplates. I then riveted the nutplates to the tabs. I used the countersink to prepare the outer skin of the lower fairing and then riveted the tabs to the lower fairing. I then screwed the fairing halves together. Next I will need to install the vertical stab on the fuselage, install the rudder and then fit the fairing onto the tailcone.


