Friday, February 26, 2010

Vert Stab Completed

I completed Section 6 of the V Stab assembly today. I bolted the upper hinge assembly on the rear spar and wired the lower hinge assembly with a bag of bolts and washers to the lower end of the spar. The fairings will be installed with Section 12.

I started to work on the rudder components. Separated the parts, removed the blue film and polished the edges.

Clamped the spar caps to the spar and matched drilled the web holes. Removed clecos, chips and deburred the holes. Clecoed the spar caps back in place and match drilled the holes in the spar flanges.

Disassembled, deburred holes and polished all parts with a maroon Scotch Brite pad.

Primed the internal parts of the rudder. They are now ready for assembly, however, the rudder horn is on back-order.

I contacted Van's and was told they have the rudder horn and will ship it this week. The other parts for the horizontal stabilizer will not ship until after March 8th.

Thursday, February 25, 2010

Riveted Vert Stab


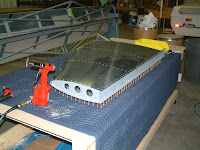
Today I riveted the V Stab skin per the drawing instructions. I started at the leading edge and removed 1-cleco and installed 1-rivet. I proceeded this way until the remaining cleco count on each rib was the same. At that point I removed 1 cleco on each rib and installed a rivet in each hole. All worked out well. The skin fit just right. I did have to final drill about 5 holes on each side of the V Stab to get the rivets to seat properly. I miss pulled one rivet and had to drill it out, but all went well.


After riveting the main skin I installed the nose skin.


Tomorrow I will install the hinges on the rear spar and the V Stab will be complete except for the fairings which will be installed in section 12.

Tuesday, February 23, 2010

Attacched Skin to Vert Stab


I prepared the main VS skin and the forward skin for installation. I removed the tabs as called for on the drawings. I final drilled the #19 holes and deburred. I deburred the edges of the skins, dimpled the #19 holes for #8 screws. Also dimpled and began installing the platenuts. I had a problem with one of the flush rivets and it became necessary to drill it out and replace it. As you can see below, these are small rivets.

I removed the blue vinyl film and began to cleco the skin to the framework. After getting the holes lined up at the tips of the ribs, all of the holes fell into line. I was able to cleco one side, then turned the whole assembly over and started clecoing the skin on the other side. The holes continued to line up without any trouble. Scott Smith took my picture while I was installing clecos.

I took Scott's picture as he installed a cleco. We are a couple of real aircraft manufactures.

Monday, February 22, 2010

Vertical Stabilizor Skeleton Assembly


I began to assemble the vertical stabilizer skeleton. Attached the upper spar caps to the spar per the plans. Fluted the ribs so they are flat.


Next I attached the lower spar caps, VS-1208 rib and platenuts per the drawings. Then I attached the VS-1207 rib with pulled rivets.


Finished the assembly by attaching the front spar and plate nuts, and ribs VS-1205 and VS-1206. The VS assembly is now ready to begin installing the aluminum covering.