Friday, June 17, 2011

Flaperon Torque Tubes


I rolled the fuselage back onto it bottom so it is upright.  I installed the spacer material in the holes in the sides of the fuselage and pushed in the torque tubes.  The line up with the torque arms so I clamped them in place.  
 
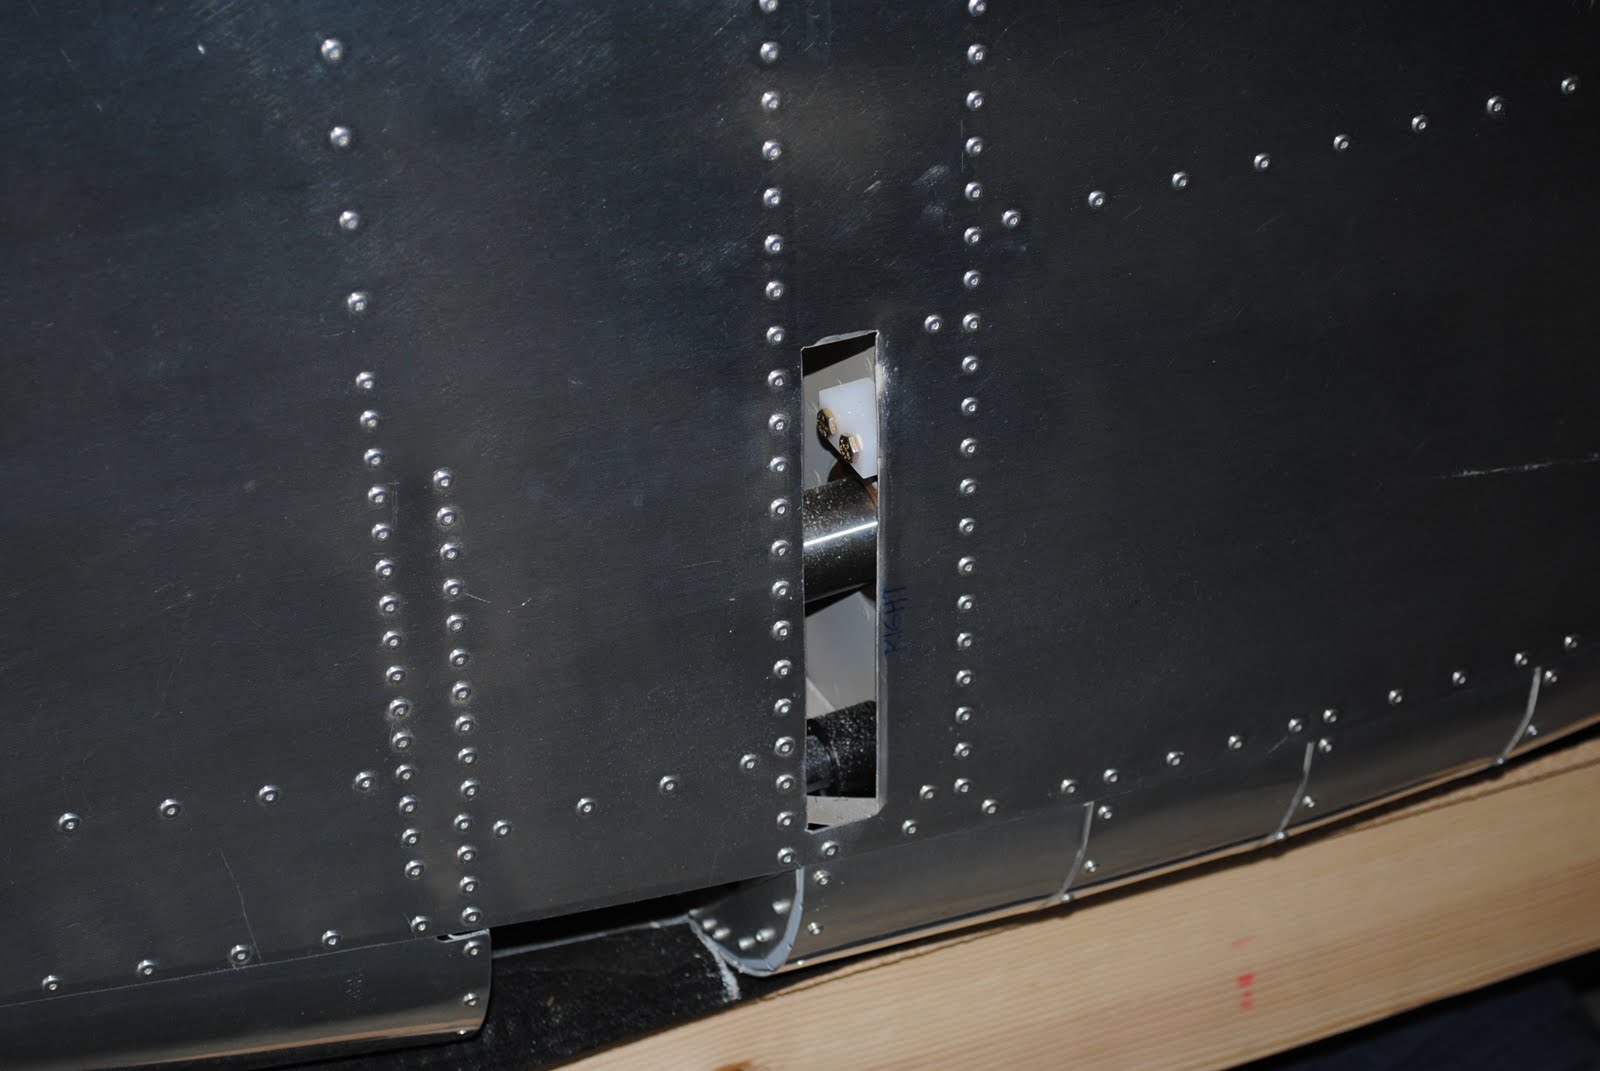
I then straightened and cleaned-up the edges of the holes in the fuselage sides where the wing spars slide into the fuselage.  When we installed the wings the first time we had a little trouble extracting them.  My grandsons were not able to keep the wings perfectly level and they scraped and bent the edges of the fuselage skins at the openings.  I fixed the problem  by straightening the aluminum at the openings and then increasing the width of the openings with a vixxon file.  We are all set for the next wing installation.

Friday, June 10, 2011

Flaperon Torque Tube Spacers

 
I purchased some epoxy on my way home this evening.  I roughed up the inside of the brackets and the spacer blocks.  I match drilled #30 the spacers to the brackets.  Next I final drilled the spacers with a #12 bit.  I mixed some epoxy and spread a thin layer on the inside of the brackets and installed the spacers.  I used a piece of 1/8" aluminum angle to hold the spacers in place and then riveted them.

Wednesday, June 8, 2011

Flap Detent Bracket and Assembly

 
This evening I worked on assembling the flap bracket and flap handle.  I separated the angles and bracket parts as shown.  I deburred all of the edges and put the detent bracket assembly together.
 
 
I put the detent bracket through the flap handle and attached it to the seat floor with correct screws.  I installed a .025" spacer as shown.  After everything was in place I discovered the flap button was recessed too far into the flap handle.   
I disassembled everything and moved the button about 1/8" then re-drilled and re-riveted it in place.
 
After the flap handle was reinstalled I started to work on the flaperon torque tubes.  I cut the spacer blocks to length and inserted them into one of the torque tubes.  I used a scrap of 1/8" angle to make sure the space between the blocks was as required.  I need to purchase some epoxy so I can glue and rivet the spacer blocks into the ends of the torque tubes.

Tuesday, June 7, 2011

Flaperon Pushrods and Flap Handle Tube

This evening I installed the bolts attaching the flaperon pushrods to the torque arms.  It was not as straightforward as I had hoped.  I had to use the close quarters angle drill to ream out the holes in the torque arms.  They are powder coated and the powder coating was in the holes.  I was able to ream the holes so the bolts would go through.  I also had to use a small file to clear away a small distortion between the forks on the right torque arm.  The bearing would not seat between the forks properly, but after some work with a file I got everything to line up.  After that I was able to install the bolts, washers and nuts without too much trouble.

 
After attaching the pushrods to the torque arms I started to work on the flap handle tube.  I separated the parts for the fork end and installed them on the end of the tube.  I cut the tube to length and after using the Scotch Brite wheel on the end of the tube I was able to push the flap button onto the end of the tube.  I slid the tube into the flap handle to see if it looked like it would fit.  It looks fine.

Monday, June 6, 2011

Flaperon Pushrods


This evening I fabricated and partially installed the flaperon pushrods.  The pushrods are made from AT6-058x3/4 aluminum tubing.  When making the control stick pushrods I mistakenly cut 7.75" off of the 6' piece of AT6-058x3/4 aluminum tubing sent by Van's.  That left me without enough material to make 2-34.625" pushrods.  Last week I ordered a 48" piece of tubing from Van's.  It arrived today so this evening I was able to cut 2-pushrods.  One out of the original piece of tubing and one out of the replacement piece I received today.  I deburred, prepped and primed the tubing and inserted the stud endcaps.  I drilled the ends and installed the rivets.
 
 I installed the bearings on the ends of each pushrod and tightened the nuts.  Next I installed them in the fuselage.  I bolted the foreword ends to the flaperon mixer bellcrank.  
The work space continues to get smaller and smaller but my hands don't seem to be shrinking in size.  I was forced to use my large curved forceps to hold the nut behind the bellcrank.  The pushrods extend from the bellcrank to the flaperon torque arms.  I used Krazy glue to attach washers to the inside of the torque arms where they attach to the bearing brackets.  Once again, I used the forceps to hold the nuts in place because I could not get my hand into the confined spaces.
 
Next the flaperon pushrods need to be attached to the torque arms.  I will do that at a future work session.

Wednesday, June 1, 2011

Control Stick Pushrods

This afternoon we returned from a visit to our kids in Gilbert, AZ.  We left last Thursday at Noon and got back at 2:30 pm today.  After unpacking the car and putting things away, I was anxious to do some work on the 12.


I cut the tubing for the control stick pushrods.  I drilled and taped 1-inch at the ends of pushrods.  I prepped them and primed them.  After they dried I installed the bearings and adjusted them to the proper length.  There are 2-small spacer washers – 1-on each side of the bearing that attaches to the bottom fork of the control sticks.  I used krazy glue to attach the spacer washers to the bearings.  
 
It was not easy but I was finally able to insert the bolts trough the forks and bearing assemblies on each of the control sticks.  The work space is really confined.   I ended up using some large forceps to hold and insert the parts, washers, bolts, nuts, etc.  I had to use my close quarters angle drill to remove the powder coating from the holes in the control stick forks.  That was crazy enough.
 
 
I also had to ream the holes in the flaperon mixer bellcrank so the bearing attachment bolt would fit.  During the installation I dropped the bolts down into the fuselage.They fell into an area I could not see, even with my inspection mirror and a flashlight.  As luck would have it I was able to use my magnetic reach tool to retrieve them.   Though they are difficult to see in these photos, the control stick pushrods and installed.