Friday, March 30, 2012

Sand and Fill Fiberglass

 More of the same.  I set up the work tables and set up the canopy.  I sanded the filler material I applied 2-evenings ago. 
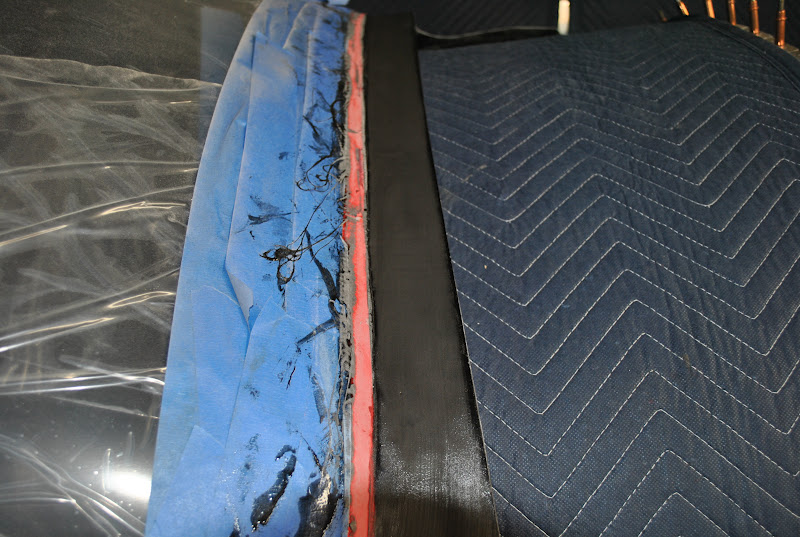
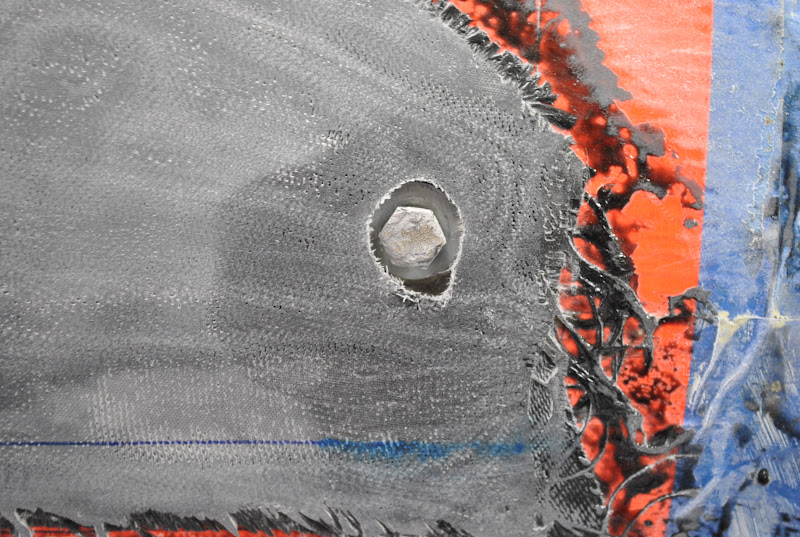
After sanding I mixed some more material.  This time I did not color it black.  I applied the filler material to the locations on each side of the canopy shroud that is sunken.  I hope this is the last time I will need to fill these voids.  Soon I will reinstall the canopy on the fuselage and see what I will need to do to make it 
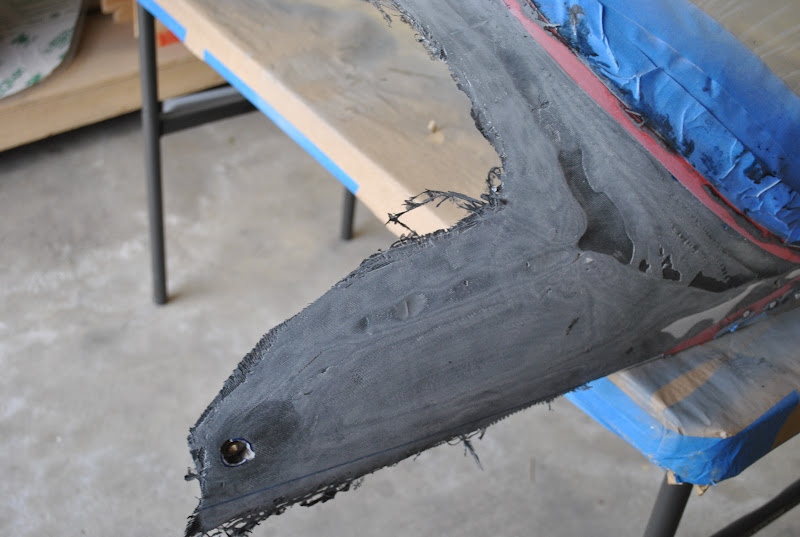
pivot up and down properly.  From the pictures I have seen of finished aircraft I am sure there is going to be some rounding and shaping of the forward sections of the shroud at the pivot points.
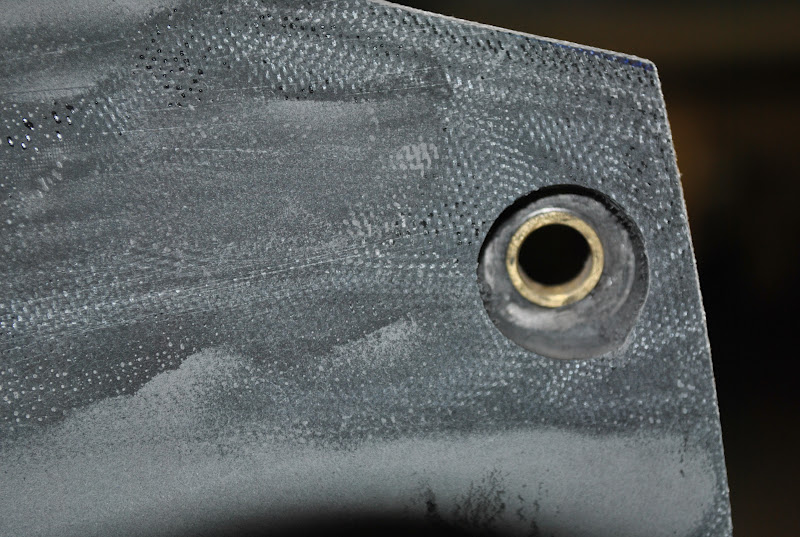
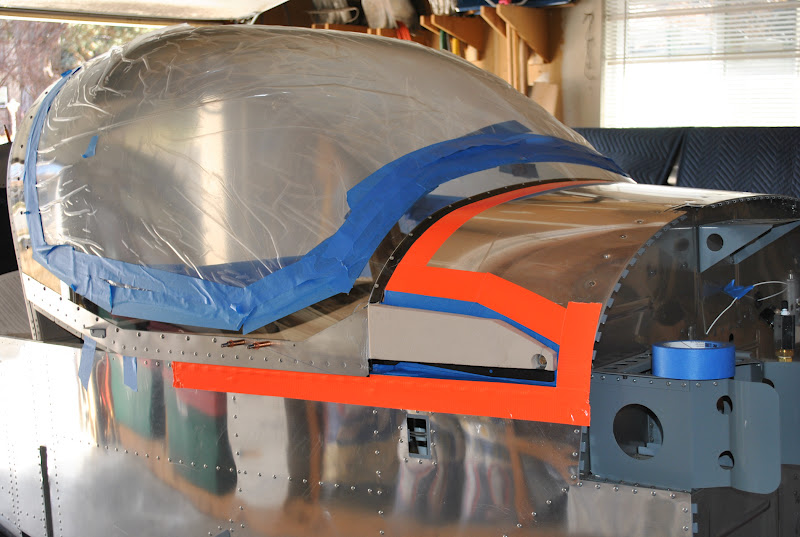
This evening I had Arlene help me put the canopy back on the fuselage.  When lifting the canopy it hits the upper fuselage skin as it pivots.  I will need to remove the upper corner of each side.  It is also quite possible that I will have to remove some material on the most forward upper edge, so when the canopy it in the vertical position it does not hit the forward part of the upper fuselage skin.

Wednesday, March 28, 2012

Sand and Fill Fiberglass

  This evening I used my finish sander with 100 grit paper to sand the filler I applied yesterday.  I sanded the whole surface to prep for additional filler.  I also used the small sanding drum on my Dremel tool to clean-up the pivot bolt holes.
 From the camera angle it looks like the bolt and washer could not fit, but actually they fit into the hole really well.  I will need to do some additional work on the left side hole.  I mixed some more resin with black colorant and micro-balloons and spread a new layer of material over the fiberglass.  I think I can have the low spots filled with one more application of filler material.

Tuesday, March 27, 2012

Trim and Fill Fiberglass

   
 This evening I used the trim template to mark the fiberglass shroud.  I used my Dremel tool with a cut-off wheel to cut along the mark line.  It worked very well.  I then used a sanding block to sand to the trim line.  I put a small (1/2") diameter sanding drum in the Dremel tool and opened the pivot bolt holes in the support arms.  On initial inspection the right opening is good.  I may have to work on the left bolt hole.  The washer fits into the right opening perfectly.  I have not tried the left opening yet, but I have a feeling it will not be as good a fit.
  I mixed a small batch of epoxy resin and added some black colorant and some micro-balloons.  Using a Bondo squeegee I started to fill the low spots on the shroud.  This is the first pass.  It will take some additional material to fill the voids and smooth the surface.  Right now the filler is a little on the rough side, but I can sand it out after it cures.  I also worked on the pivot bolt holes.  I filled the voids behind the fiberglass.  I used a popsicle stick with the end cut to a wedge to help fill, shape and clean-up the holes.  I think with a little more work they will be fine.

Monday, March 26, 2012

Sand Fiberglass and Remove Canopy

 
I started by sanding the fiberglass lay-up.  I was able to use my finish sander with 60 and 80 grit paper to start the sanding process.  It went fairly well.  I was able to sand down to the first layer of electrical tape on the canopy.  I will change to 100 and 150 grit paper at this point.
Using a putty knife I separated the fiberglass lay-up from the fuselage by running the blade along the edge of the fiberglass.  I marked and drilled a hole through the fiberglass over each of the bolts holding the canopy support arms in place.  Then using the Dermal tool with a burr bit I enlarged the holes so I could get a nut-driver over the bolt heads.  I removed the bolts and the washers.  I used the washers to trace a circle around the bolt heads.  I will open the fiberglass to the required size opening and then fill-in the exposed foam with a mixture of fiberglass resin and micro-balloons.  I also projected and marked the line of the canopy skirt onto the fiberglass lay-up.  This will help me line-up the trim pattern properly.
 Next I had Arlene come down and help me lift the canopy off of the fuselage.  We were able to successfully lift the canopy and set it on the small work tables. 
I was impressed with the way the interior turned out.  There were almost no runs and drips of resin inside.  Of course there will be some clean-up needed on the interior.  There is some blue tape residue and some sanding dust that will need to be removed.  At this point any work on the interior surface will need to wait until I have filled and trimmed the exterior.  All and all I am very pleased with the results so far.  
   
I removed the masking from the fuselage.  I put a moving pad over the tailcone and placed the canopy on the tailcone for safe keeping.

Friday, March 23, 2012

Fiberglass Canopy Shroud

 I took off early today so I could work on the canopy fiberglass.  The temperature today is 70+ degrees.  It is a great day to fiberglass.  I pushed the fuselage to the center of the garage and pushed the tail out the garage door.  I sanded the canopy and canopy skirt where the fiberglass will be applied.
 I put Mylar packing tape over the duct tape and then rubbed a thin coat of wax over the Mylar tape.  I used some old mat board to make some flat pieces to support the fiberglass below the canopy support arms.
  I set up the small work tables and cut the side pieces and the long strips of fiberglass cloth that will go on top of the upper fuselage.  There are 10-side pieces (5-left side and 5-right side) of fiberglass.  There are 10-long narrow pieces to be installed on the top of the upper fuselage.  I was able to tape the fiberglass down to the cutting board and using the rotary cutter, prepare the strips for installation.
 I preceded to mix the fiberglass resin and add colorant.  I am coloring the resin black so when it is viewed through the canopy it will be black.  Following the instructions I brushed a coat of the mixed resin on the foam block, canopy Plexiglas and aluminum skirt on the right side of the fuselage.  I carefully wetted out the first layer of fiberglass cloth by placing the cloth between 2-sheets of 4 mil plastic sheeting.  Using a small brush I put resin on the cloth, then using a squeegee I spread the resin through the cloth.  It worked really well.  I then removed the upper layer of plastic and placed the layup on the fuselage.  With a little minor adjusting I was able to move and slide the piece of fiberglass cloth into place.  I then preceded to do the same thing on the left side.
After the fiberglass was laid-up on the sides and the top I laid-up a layer of peel-ply over the whole shroud.  After working on the project for 6-½ hours I cleaned up the messes, put the airplane and fiberglass supplies away and let the whole thing cure.

Monday, March 19, 2012

Shape Canopy Foam Blocks

 
This evening I glued a piece of 80 grit sand paper to an 18" long piece of 1x4 and sanded the foam canopy blocks.  By using a piece of 1x4 it is easier to shape the blocks to the profile of the fuselage.
 
I wiped and vacuumed the dust from the fuselage and surrounding areas.  Next I taped the right fuselage masking guide in place and put a layer of red electrical tape on the canopy and fuselage skirt.  I then moved to the left side and repeated the process.
 
I then put red electrical tape over the forward canopy to connect the 2-sides together.  Next I put masking on the canopy over the red electrical tape.  I will need to mask the fuselage sides and rough up the Plexiglas canopy and aluminum skirt.  I will then be ready to start the fiberglass.  I hope to be able to put the fiberglass on the support arms by Friday.

Saturday, March 10, 2012

Canopy Continues

 
This afternoon I discovered some additional unexpected fiberglass resin problems.  Before the resin was set up it did an little running.  Some resin seeped out of the slots in the support arms and puddled around the pads on the clamps.  When I removed the clamps I found some smears of hardened resin and a slight run.  I decided to sand the inside of the support arms and recoat them with black Hammertone. 
 
I carefully masked off the areas surrounding the arms.  
 
Next I sprayed them with the black Hammer-tone paint.  They look pretty good again.
 
After the paint dried I masked the inside of the support arms and then had Arlene help me set the canopy in place on the fuselage.  I also found a small drip (run) of resin on the corner of the canopy bow on the left side next to the plexiglass canopy.  There is another blob and run of resin on the rear canopy frame.  I will address these at a later date.
 
 
I took some shots of the inside.  All you can see is the masking of the fuselage and instrument panel but at least is shows some progress.
 
I also took a couple of pictures of the fuselage with the canopy back in place.  I am getting excited again about moving the build forward.  The weather has been steadily improving.  Right now it is 61 degrees.  If this keeps up I will be able to put the fiberglass surround on the canopy when we get back from Gilbert.  We are flying Southwest to Gilbert tomorrow.  We will be there until next Saturday.  I attended the EAA Chapter 23 meeting Friday night and had a chance to speak with Tom Driscoll.  Tom is building an RV-12 also.  From the sound of things we are pretty much at the same point in the build.  We have both ordered the Avionics kit and are waiting for the kits to be shipped.  I will need to go out to his place sometime and see what he has accomplished.