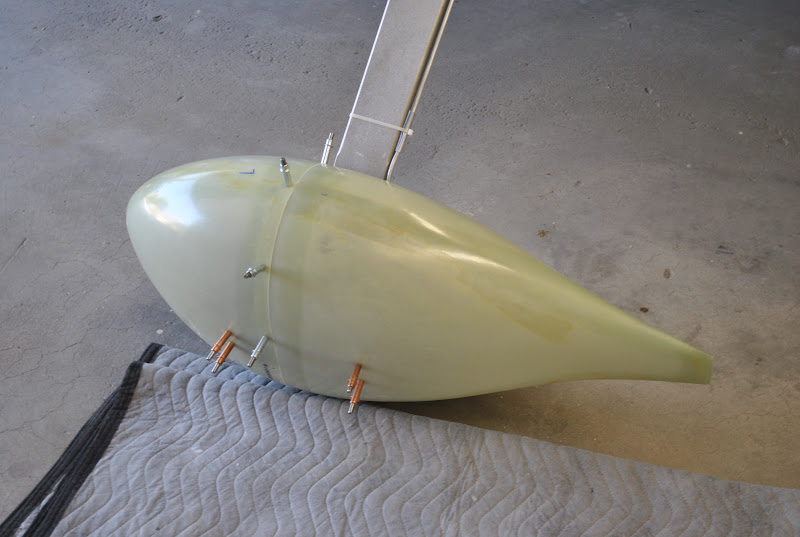
Friday, September 28, 2012

Wheel Pants & Fairings

I removed the wheel pants after installing them with and epoxy/glass beads paste.  The mixture did not do so well during the installation of the pants.  There was little epoxy around the mounting brackets to hole the pants stationary.  I surmised it was because I didn't put enough of the epoxy mixture around the screw holes and because in mounting the halves I smeared the material out of place.  I mixed new epoxy/glass beads and reinstalled them on the brackets.  This time I put additional material in the appropriate places and the seem to be fine.

Thursday, September 27, 2012

Wheel Pants

I did the final fitting and installation of the mail wheel pants.   I worked on the right pants and fitted them to the right main gear.  I needed to do some additional trimming of the cut out for the gear leg and brake line.  I was able to get them to fit properly.  I then turned my attention to the tire opening at the bottom of the pants.  As indicated in the drawings, I needed to open the outboard portion of the tire opening.  I used a Sharpie to make the bottom of the pants and then used the Dremel tool to cut out the excess materials.  I then used a sanding drum on my angle grinder to round the corners.  I also marked the leading and trailing edges of the tire openings using a detergent bucket for the shape.  I used the sanding drum to round the openings.
I used a piece of 80 grit sand paper to rough the inside of the bracket attachment holes after final drilling them.  After cutting and trimming the wheel pants I used a blow gun to blow off the dust.  I used some MEK to clean the blue Sharpie ink off of the pants.  I also cleaned the sanded areas around the bracket mounting holes.  
I used a candle to apply wax to the mounting screws.  This is to prevent the epoxy mixture from adhering to the screws.  I mixed some epoxy resin and added some glass beads.  As instructed I mixed it to the consistency of peanut butter.  I then spread the mixture around the bracket mounting holes on the inside surface of the wheel pants.  I put some blue making tape on the surface of the mounting brackets on each wheel.   Starting with the right gear and wheel I installed the pants, securing them to the brackets with #8 screws.  The went together without any problems and the pants seemed to fit properly.  The epoxy mixture was squeezed around the ends of the mounting brackets.
The parts fit together very well.  Tomorrow I will remove the pants and tape and see how the epoxy turned out.  Next I will install the nutplates to attach the for and aft halves of the pants together.

Wednesday, September 19, 2012

Center Panel, Swap Pins and Start Pants Install

Today I worked on some miscellaneous things.  I final glued the carbon vinyl wrap to the bottom edge of the center panel.  It has come loose.  
I then reinstalled the center panel.  It looks acceptable to me this time.
I also swapped the pins in the "Optional" D-sub connector where it attaches to the control module.  Using the proper tool I removed pins 3 & 4 and reinserted them in reverse order.  This is due to a software change in the  4.0 firmware of the Skyview download.  I have yet to download and install the software, but I decided to swap the pins now.
I then turned my attention to the left main gear fairing.  I clecoed the aft portion of the fairing in place.  It seemed to be too tight around the gear leg.  I checked my measurements and somehow I did not remove enough material. 
 I removed some additional material to the rear and top of the opening.  I reattached it to the bracket and it fits well.  I also needed to remove a small amount of material from the forward fairing to make it fit properly.  

Thursday, September 13, 2012

Fuel Shut-Off Valve and Fairing Brackets

This afternoon I decided to work on the fuel shut-off valve.  I have not been able to get the hole in the red ball handle lined up with the lever to the valve.  I removed the lever and by removing the screw from the red ball handle I was able to determine how deep the lever goes into the handle.  I drilled a #40 hole at the edge of the red ball.  I cut a piece of coat hanger wire and put it in the hole so it protrudes  1/32" on each side.  How when the red ball handle is placed on the lever it is at the correct depth to allow the screw to be installed.  I also painted the lever to match the interior color of the cockpit.  I installed the floor plate and installed the red ball handle.
I then installed the wheel fairing brackets on the main gear.  I jacked up the left side first.  I removed the wheel and axel. I then reinstalled the axel using the inboard mounting plate in place of the double washers.  I reinstalled the wheel and bearings.  I installed the outboard mounting system and both brackets.  I did the same on the right side.  Now I am ready to start the installation of the fairings.

Wednesday, September 12, 2012

Center Panel and Wheel Fairing Brackets

This afternoon I purchased a can of tennis balls.  I cut an 'X' in one of the balls and put it over the OAT Probe.  I think the tennis ball will offer better protection for the probe than the blue tape I had criss-crossed over the probe.
Over the last few weeks I have noticed that the carbon vinyl wrap on the instrument panel has shown signs of distress.  At the fastener locations, the vinyl seems to have twisted and puckered.  It was especially noticeable at the fasteners securing the switch module.  The center panel seems to be the worst affected.  I had already removed the center section.  I removed the carbon vinyl wrap from the center section.    I applied a new coat of primer on the edges and around all of the fastener holes.  I used another piece of the carbon vinyl wrap to recover the center section.  I used care to be certain the replacement piece of vinyl was in the same orientation as the old piece.  This time, because of previous experience I was able to get the vinyl to lay down fairly well.  I cut out the sections for the radio and the switch module.  Because the strip of vinyl was not wide enough to cover the whole section of panel, I spliced a section on the lower portion below the control attachment holes.  After adhering the vinyl to the panel and cutting out the radio and switch module sections I opened the fastener holes.  I will wait several days before reinstalling the center section in the airplane.  I want to allow the adhesive on the back of the vinyl to cure.
Next I turned my attention to the mail wheel fairing attaché brackets.  I removed the blue vinyl film and deburred the holes and edges.  I used the used the micro countersink to prepare the holes for riveting on the nutplates.  I clecoed the nutplates to the brackets.  Using the squeezer I riveted the nutplates to the brackets.  I then prepped the brackets for primer.  Next I primed the brackets and hung them up to dry.

Friday, September 7, 2012

Upholstery and Main Wheel Pants

Over the last week I have spent a few moments here and there working on upholstery and wheel pants.  This afternoon I did a lot of work on the wheel pants.
I also decided to work on the vinyl wrap on the instrument panel.  The screws and washers have twisted some of the vinyl and it doesn't look too good.  I removed the center panel and will do something about the vinyl wrap.  
I have worked on fitting the fairing halves together.  I think I have been able to get a pretty matching seem on both sets of pants. 
I drilled the #40 holes (9 per joint) and trimmed the bottom  of the pants to the wheel opening scribe lines.  I laid out the gear leg openings and cut the holes in the sides of the pants.