Thursday, September 30, 2010

Bulkhead Side Assemblies, Caps and Rollers

This morning I installed the bulkhead side assemblies to the floors.  I also primed and installed the bulkhead caps.   
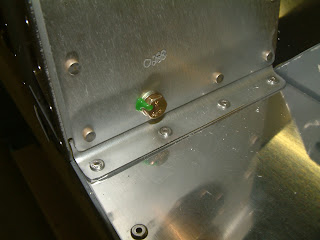
After installing the caps I installed the wing spar rollers.  I used the torque wrench to set the torque on the bolts holding the rollers in place.  I also torqued the bolts on the wear plates and the flaperon mixer assembly.  
After the bolts were set to the proper torque I put torque seal on the heads of the bolts to ensure they don't move.

I gathered the parts and pieces for the next section of work.  I deburred the edges and holes in the control column brackets.  I used the countersink to prep the holes around the bearings and to attach the nutplates.  I then primed the parts.
The brackets are now ready for assembly.

Wednesday, September 29, 2010

Relocated Nutplates Installed Floor Supports

Today I completed the repair project I started yesterday.  I drilled out the rivets holding the nut plates.  I used a #30 drill bit to drill out the heads of the rivets.  I then used a #40 drill bit in the drill press to drill the body of the rivet out of the holes in the ears of the nutplates.  It was a fairly simple process.  I was able to remove the nutplates without damaging or enlarging the holes in the ribs or the nutplates.  Next I drilled the #19 holes where the nutplates will be attached to the correct ribs.  Next I clecoed the nutplates to the ribs and proceeded to install the rivets.  It was good to get that little correction made.
I also riveted the nutplates to the edge of the floor skins.  There are a buzillion nutplates to be installed in this section.
I then riveted the floor skins to the floor ribs, using the LP4-3 and CS4-3 rivets called out in the instructions.
I used the 1/8" back-up washers on the ribs where I removed the nutplates.  The fastener holes at each nutplate was previously drilled to #19 so it was too large for a LP4-3 rivet to work properly.  With the back-up washers they worked fine.
I clecoed the floor/rib sections to the fuselage center section.  I riveted them in place. It was pretty tight quarters riveting the ribs to the center bulkhead.

Tuesday, September 28, 2010

Floor Support Angles and Corrections

 Today I separated the floor support angles then deburred and primed them in preparation to installing them to the floors. 
As I was preparing to attach the floors to the ribs I discovered a problem.  When I attached the pulley bracket assembly and the flaperon mixer assemble to the floor ribs, I used the wrong ribs.  I was supposed to use the floor ribs WITH the nutplates installed, but I suppose I didn't read the directions clearly enough.  I used ribs WITHOUT the nutplates installed.  Now, in reviewing the directions I discovered the ribs with nutplates need to be riveted to the floors. However, I can't install rivets where there are nutplates.   
I will need to drill out the rivets holding the nutplates to the ribs and reinstall the nutplates to the correct ribs.  I will install the nutplates on the correct ribs and drill the holes to #19 as required.  I have purchased some 1/8" aluminum back-up washers to use when I rivet the floors to the ribs where some of the holes have been drilled to #19.

Monday, September 27, 2010

Seat Floor HInges


This morning I cut the hinges for the seat floors.  I made a mistake in cutting the length of hinge ½" too short.  In order to salvage the pieces and not order new hinge materials in the future I used a piece of scrap hinge to adjust the way the hinges are laid out and mounted to the seat floors.
After drilling and deburring the hinges and the floors, I primed the hinges and riveted them to the seat floors.  I also dimpled the edges of the floors as indicated in the instructions and prepared to attach the floor ribs.
Tomorrow I will separate the floor support angles.

Friday, September 24, 2010

Seat Ribs Center Sections

This morning I dimpled, used the countersink and prepped then primed the crotch belt brackets.
I then proceeded to assemble the seat rib center sections.  I riveted the pulley bracket assembly to the right seat ribs.
I began to install the flaperon mixer assembly.  At that point I realized I needed to install the auto-pilot servo doubler between the mixer assembly and the seat rib.  I cut out the area between the rectangular holes in the seat rib and prepped and primed the edges of the opening.  I also drilled out the lower rivet in the sloped flange of the seat rib because it interferes with the screw that will be installed in the corner hole of the servo bracket doubler.  I then clecoed the servo doubler to the rib and match drilled the #30 and #12 holes.  I separated and deburred the parts then riveted the doubler to the seat rib.
I riveted the doubler to the aft intercostals and then clecoed and riveted the rib to the flaperon mixer assembly.
I then riveted the called out nutplates to the crotch strap brackets.
Next I clecoed the crotch strap brackets to the seat ribs and riveted them in place.
I put the floors over the ribs and set them in place in front of the center/baggage section of the fuselage.  It is beginning to take shape.

Thursday, September 23, 2010

Let and Right Seat Rib Assemblies

This morning I prepped the left and right seat ribs for priming.  I deburred the edges of the ribs and the lightening holes with a Scotch Brite wheel.  I then used a Scotch Brite pad to prep the edges and webs of the ribs.  I then took the ribs outside and used the priming station to prime all of the seat ribs.
I started to assemble the seat belt lugs to the left and right ribs as directed in the drawings.  I clecoed the ribs, seat belt lugs and supports together for final drilling.
I assembled 2 each left and right seat belt ribs with lugs and 2 each additional seat rib assemblies.

Wednesday, September 22, 2010

Pulley and Flaperon Mixer Assemblies

I primed and assembled the Pully and Flaperon Mixer Assemblies.  
I prepped the seat belt attach brackets and support angles for primer.  I then primed these parts.
Next I marked the vertical piece of material on the seat ribs and cut them out.  Next I will deburr, prep and prime the seat ribs.