Tuesday, April 1, 2014

Tire Pressure and Update SkyView

This morning I started by adding air to the 3-tires.  I noticed they looked low on Saturday.  I checked the pressure in each tire and it was down 10-12 lbs per tire.  I got out the air chuck and brought the pressure up to 25 psi in each tire.  I then decided to update the SkyView software.  I attached the battery charger to the battery and then got inside the cockpit.  I previously downloaded the update files on the Dynon flash drive that came with the system.  The instructions say do not load the files into a subdirectoy.  The SkyView system cannot read them in a subdirectory.  The files must be in the "root" directory.  I turned on SkyView and attempted to load the files.  I got an error message saying there are no files found.  Of course, when I downloaded the files from the Dynon website I saved them in a subdirectory.  Luckily I have a computer at the hangar so I was able to transfer the downloaded files from the subdirectory to the "root" directory.  I restarted the system, inserted the flash drive and proceeded to the update screen.  Voila, there they were.  I proceeded with the upload and updating of the SkyView system.
Because this is the first time I have updated the system and the current version is older than the 4.0 update, I had to load all of the update files manually.  First I loaded the 7.1 SkyView update.  Then I proceeded to upload all of the additional files.  It wall went really well.  It took a while, but the update was successful.  
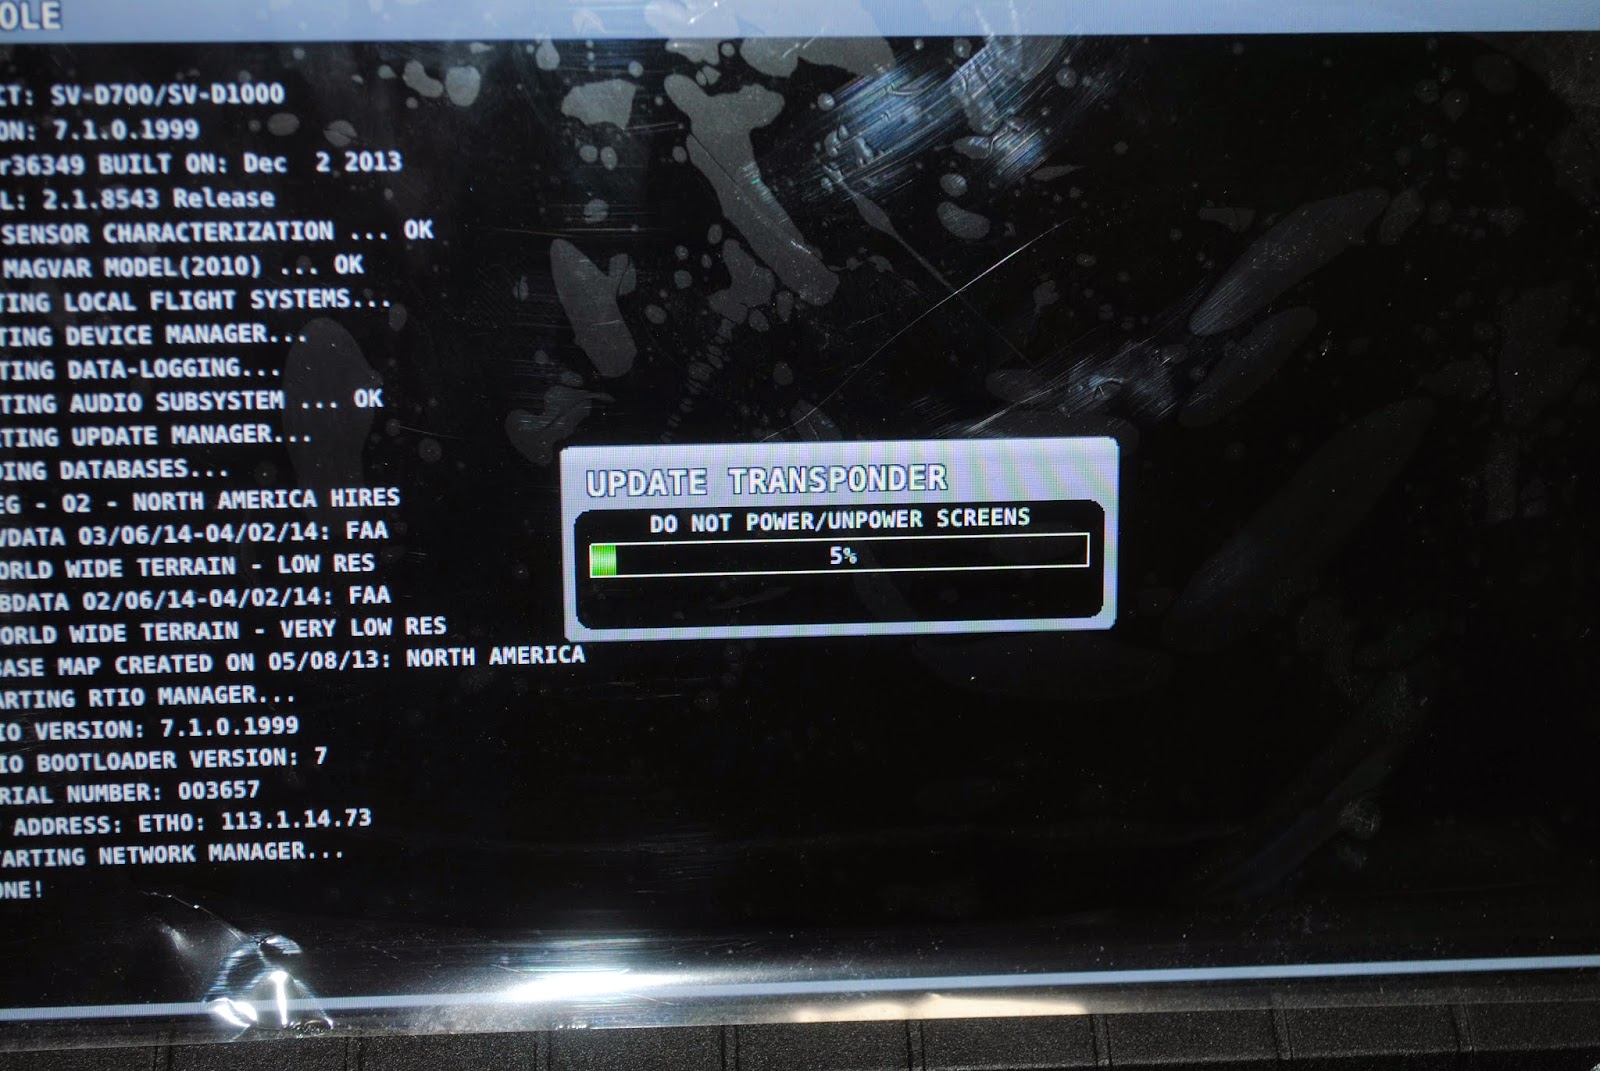
I was even able to update the Transponder.  I have printed the new label that must be installed on the transponder unit.  I will put the label on when I take the upper fuselage skin off to be painted.  I took some pictures of the screen as the updates were being copied and installed.
After loading all of the updates I calibrated and tested the AP servos.  Those processes went well and the SkyView recognizes them and they passed the test.  I took some additional photos of the SkyView screen after the down loading and updating and then discovered through the process I lost the Spar Pin status indication on the EMS screen.  I looked in the installation guide to see if it tells how to set up that widget.  No luck.  
I took a photo of the screen as it looks.  That is how I discovered the spar pin icon was gone.  I looked through the build manual at all of the SkyView drawings and instructions but could not find anything about setting up the spar pin icon.  I decided to go home and do some searching in Vans AirForce to see if there was anything posted there.  I was not able to find anything.  I then did a web search by typing in SkyView Spar Pin Set-up.  I was taken to a Dynon Forum that had the answer.  They had an attachment which was to restore the Vans RV-12 EMS settings.  I downloaded the file and went back out to the airport.  I downloaded the file into the Skyview and there it was. 
A single fuel tank and a spar pin widget and a stall warning Widget and the CHT and EGT scales.  Thank heaven.   So far so good.

Saturday, March 29, 2014

Lunch at the Hangar

Today Tim and I went to the hangar to install the wings and do a few things before the family came out to have lunch together.  It was basically our family who have helped to build the airplane over the last few years.  Tim and I put in the last three labels in the airplane.  We put in the gas shut off valve label, the 12V power out let label and the music input label.  Then we moved the airplane out onto the apron and installed the wings.  We rolled it back into the hanger and waited for the family to come. 
After the family came we had sandwiches and then the kids took turns sitting in the cockpit.  They also had a lot of fun seeing the airplanes come and go.  It was a bit windy but I think everyone had a great time. Now I need to remove all of the upholstery and access panels to be ready for the certification inspection.

Friday, March 28, 2014

Upholstery

The first thing I did today was connect the tank filler to the top of the tank.  
I began to install the upholstery and bulk-head covers.  We are having a family and friends gathering at the hangar on Saturday the 29th for lunch.  I want the airplane to look as finished as possible for the lunch.  I set the baggage compartment bulkhead in place then put in the rear bulkhead upholstery. It is all there temporarily.  I also put the tank cover in place and by pressing down on the Moller fuel gauge I was able to make an indentation on  the back of the cover so I could cut out the opening for the Moller gauge.  I also cut a slot and a hole for the new tank vent.  I laid the baggage floor access panels in place then installed the rest of the upholstery including the tank cover.  I think it looks pretty good.
I removed the seat backs and installed the upholstery on the floor of the fuselage.  I also put the upholstery over the tunnel between the pilot and co-pilot pedals.

For now much of the upholstery is laid in loose because I will need to remove it along with the access panels for the certification inspection.  I have spoken with and exchanged emails with Tom Gierhart, the DAR who will be doing the inspection.  I also checked with the Federal Aviation Title Company about the status of my registration.  The forms have been submitted but they don't think any action will be taken until after the 18th of April.  I let Tom know.  He is going to Colorado in April so we will probably have the inspection towards the end of the month.  I will be flying to the Dallas-Fort Worth, TX area on the 28th-29th of April for some RV-12 transition training.  Things are moving along but they are getting complicated.  I also spoke with Dave Wisenger who is going to paint the airplane.  I told him I am going to Erie, PA for 10 days in April and maybe he could begin painting while I am gone.  We'll see how things go.

Thursday, March 27, 2014

Instrument Panel Placards and Labels

Today I went to Sign*A*Rama and ordered the N Numbers for the tail.  The registration number (N Number) is N419AJ.  The sign company is going to make 2-sets of the registration number so I can put them on both sides of the vertical stab.  These will be temporary for the inspection/certification.  I will have them make the permanent numbers in a maroon color after I pick the paint color at the painter's.  I also went by the Trophy Case and ordered a plastic name badge with the registration number engraved to mount on the instrument panel.  This will be a 1"x3" black plastic badge without the back so I can attach it to the panel above the SkyView display.  When I got to the hangar I began installing the placards and labels on the instrument panel.  I put the black, red and silver RV-12 placard on the upper portion of the center panel.  I think it looks pretty good there.  I also installed the other labels on the throttle, cabin heat knob, auto pilot disconnect switch, choke, etc.

Tuesday, March 25, 2014

Rear Window and Tail Fairing

Today I installed and sealed the rear window.  I used Dow Corning sealant, beige in color.  I think it worked out well.  The sealant is not effected by fuel so it should be a good thing.  I started by cleaning the window and then I put it in place on the airplane.  I used fasteners to attach the window to the roll bar and clecoed the turtle deck and the window together.
After clecoing the window in place I put red electrical tape around the edge of the aluminum.  Then I removed the clecoes and put popsicle sticks in the joint to make room for the sealant.
Next I cut the tip of the sealant tube at and angle and squeezed sealant between the turtle deck and the window.  I then installed screws in all of the holes.  I put sealant on the threads of the screws just below the head and inserted them in the holes.  I then put a washer and a nut on each screw.  I started on the right side and tightened the screws and nuts.  The sealant squeezed between the turtle deck and the window a squeezed out onto the red tape.  I wiped it off and cleaned the turtle deck with MEK.  
After the sealant set for a short time I pulled the red tape and the edge of the turtle deck looks pretty good.  The rear window is now installed and sealed in place.
The next step was to install the tail fairing and make sure the stabilator and the AST arm clear the fairing.  After installing the fairing I discovered it rubs on the right side opening in the stabilator.  Both the top and bottom skins rub the fairing.  I marked the stabilator skins with a marking pen. 
I also noticed the AST arm rubs on the left side of the opening in the fairing.  I removed the fairing and using a sanding drum removed the top and bottom stabilator skin to clear the fairing.  I also used the Vixon file to trim the fiberglass fairing to clear the AST arm.
That part of the build is now complete.